
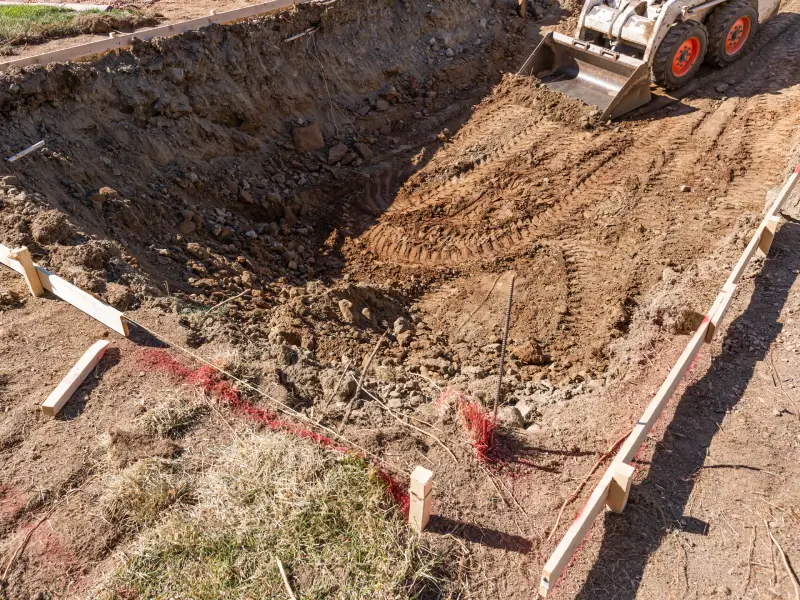
Preparing for excavation before winter starts with two steps: define the full scope and inspect the site while access is still clear. Mark the work area, check drainage, locate utilities, and plan around rain before heavy equipment arrives.
Our complete guide to excavation explains what happens after digging begins. This guide covers the work that should happen first, with a fall planning approach suited to Central Texas landowners, ranchers, and builders.
Why Plan Winter Excavation During the Fall?
Fall gives you time to solve access, drainage, utility, and permit issues before winter. Central Texas winters are often workable, but rain and soft ground can change how equipment moves across a property.
Weather affects more than the workday
A wet forecast does not always stop a project. The real issue is what water does to the soil and access route. Saturated ground may rut under loaded trucks. Water can collect in a cut, soften trench walls, or hide the slope that must be corrected.
The Occupational Safety and Health Administration requires precautions when water is collecting in an excavation. OSHA also calls for drainage controls when excavation changes the natural flow of surface water. Those rules are written for worker safety, but they also show why weather planning belongs in the site plan.
Fall planning protects your schedule
Walk the site in fall, settle the scope, then choose a workable winter window. This leaves time for utility markings, site changes, and material delivery.
Did You Know? A clear sky does not mean the ground is ready. Soil can stay soft after rain, especially in low spots and along routes used by dump trucks.
Pro Tip: Pick a backup equipment route before work begins. If the main entrance becomes soft, a second route may keep the project moving without damaging the same strip of land.
Step 1: Define the Finished Result
Property owners often prepare for excavation by marking where they want the machine to dig. That is only part of the plan. The contractor also needs to know what the finished grade, drainage pattern, and next construction step should be.
Put the project limits on paper
Start with the planned footprint and final use. Is the area becoming a home pad, barn pad, driveway, utility run, pond, or drainage feature? Mark buildings, fence lines, gates, wells, septic areas, trees to keep, and any nearby structures.
Gather any surveys, utility plans, and approved construction drawings before the site visit.
Decide what happens to removed material
Decide whether removed material will be reused, stockpiled, spread, or hauled away. Choose a loading area that will not block a road, gate, or active work zone.
Pro Tip: Mark “keep out” areas as clearly as the dig area. Protected trees, septic components, livestock spaces, and finished surfaces should be visible to every operator and driver.
Step 2: Walk the Site Like Equipment Will Use It
A machine needs more than enough room at the hole. It needs a safe path from the public road to the work zone, room to turn, and stable ground for support vehicles.
Check width, height, slope, and turning space
Measure gates and narrow passages. Look for low branches, overhead lines, sharp turns, steep grades, soft shoulders, and culverts that may not support a loaded truck. Make sure trailers can enter, unload, and leave without backing across an unsafe distance.
TexTerra does not size every job from a map or a phone description. For pad and pond work, we have described using several test holes across the footprint because Central Texas rock can change within a short distance. That extra field check can reveal shallow limestone or caliche before the planned machine reaches the site.
Protect the route before it gets damaged
If trucks must cross a pasture or gravel drive, agree on their route and any restoration included in the scope.
Did You Know? A smaller machine is not always the gentler choice. If it is underpowered for shallow rock, it may spend more time tracking over the same ground.
Step 3: Handle Utilities and Site Markings
Every mechanical dig needs a utility plan. Public utility markings are one part of that plan, while private lines may require separate records or locating work.
Contact Texas 811 early
Texas 811 says excavators must make contact at least two business days before digging, excluding weekends and holidays. After the ticket is opened, wait for responses and confirm that every affected utility listed on the ticket has replied.
Do not move or cover the markings before work begins. If rain, traffic, or mowing makes them hard to see, have them refreshed under the ticket rules instead of guessing where a line runs.
Identify private lines too
Private water, propane, septic, well, irrigation, and barn lines may not appear in the public locate.
Share old plans and mark uncertain areas. Coordinate new water, electrical, septic, or drainage trenching work with the excavation so elevations and crossings are planned together.
Pro Tip: Do not schedule concrete, utility installers, or material delivery for the first possible day after the 811 waiting period. Leave room to resolve a missing response or a private-line question.
Step 4: Plan for Water Before Dirt Moves
Winter preparation is not about keeping every drop of rain off the property. It is about deciding where water will go during and after the work.
Read the current drainage pattern
Walk the site after rain if it is safe. Note where water enters, where it pools, and where it leaves. Look for washed soil, exposed roots, sediment lines, soft shoulders, and water moving toward a planned pad.
A pad, driveway, or stockpile can block an old drainage path and send water toward a structure or neighboring area.
Add temporary controls to the scope
Discuss diversion berms, swales, pumps, stabilized entrances, or covered stockpiles when the site needs them. OSHA’s specific excavation requirements call for controls that keep surface water out of excavations and precautions where water accumulates.
Did You Know? The best time to correct a drainage detail is while the grading equipment is still on site. Returning after the ground is finished adds another mobilization and may disturb completed work.
Step 5: Confirm the Final Pre-Start Checklist
A short pre-start meeting keeps the plan from living in separate texts, drawings, and conversations.
Confirm scope and responsibility
Confirm the work limits, elevations, material handling, rock pricing, access, drainage, cleanup, and restoration. Name who handles utility tickets, private locating, permits, and inspections.
Also confirm what would trigger a change order. Hidden rock, unsuitable soil, buried debris, or an unknown private line can change the method and price. Agree on how work pauses and who approves the next step.
Check conditions one last time
Review the forecast, recent rainfall, access condition, utility responses, and site markings. Move livestock, vehicles, trailers, and stored materials out of the work zone. Make sure the contractor can reach the site contact if conditions change.
Prepare Now for a Better Winter Dig
Good excavation starts before the first bucket moves. Fall planning gives you time to verify access, locate utilities, understand water flow, and expose risks. That preparation gives the crew a clearer scope and gives you fewer surprises when equipment, trucks, and the next trade arrive. TexTerra’s complete excavation guide shows how those choices carry into digging and grading.
Planning a winter excavation project in Central Texas? Request a free site estimate from TexTerra Solutions so we can walk the property, review the scope, and plan the work around real site conditions.
Frequently Asked Questions
Can excavation work be done in winter in Central Texas?
Yes, many excavation projects can be completed during a Central Texas winter. The schedule depends on recent rain, ground conditions, safe access, project type, and whether water is collecting in the work area.
How far ahead should I prepare for excavation?
Start several weeks before your preferred work window when possible. That gives you time for a site walk, scope review, utility locating, permit checks, contractor scheduling, and any private-line questions.
What should I clear before excavation starts?
Remove vehicles, trailers, livestock, loose materials, and other movable items from the work and access areas. Do not clear trees, brush, fences, or marked features that may be part of the contractor’s approved scope.
Who contacts Texas 811 before excavation?
The person responsible for digging must make sure the required ticket is opened. Confirm responsibility in writing with your contractor, then verify that affected utility companies responded before the work begins.
What happens if it rains before excavation day?
The contractor should review access, soil stability, standing water, and the forecast before starting. Work may proceed, shift to another area, or be rescheduled if conditions could damage the property or create a safety hazard.